If you’ve recently switched from a PC running Windows to a sleek new iMac or MacBook running macOS, you might be missing some of your favorite Windows applications and features and Snipping tool mac. Fear not, my friend, because today I’m here to tell you all about the Mac alternative to the Windows Snipping Tool!
If you’re wondering how to take a screenshot or capture a specific section of your screen as an image on your Mac, you’re in luck. Apple has its own snipping tool for mac OS that’s just as user-friendly as the Windows version, complete with handy shortcuts to make your life easier.
So whether you’re a graphic designer, a tech-savvy blogger, or just someone who loves to capture and share screenshots, you’ll be thrilled to discover the power of the snip tool on your Mac. Say goodbye to the days of struggling to find the right snipping tool for your computer and hello to easy, effortless screenshotting with your Mac. Happy snipping!
How to use the snipping tool for Mac – Shortcuts mac snipping tool
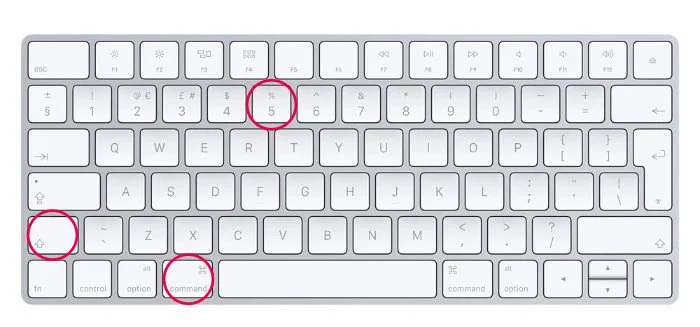
did you know that accessing the main control panel of the snipping tool on your Mac is super easy? Just use the handy keyboard shortcut Shift + Command + 5, and you’ll be ready to go!
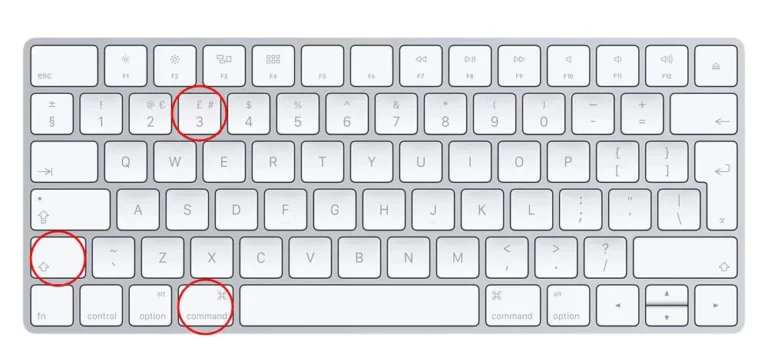
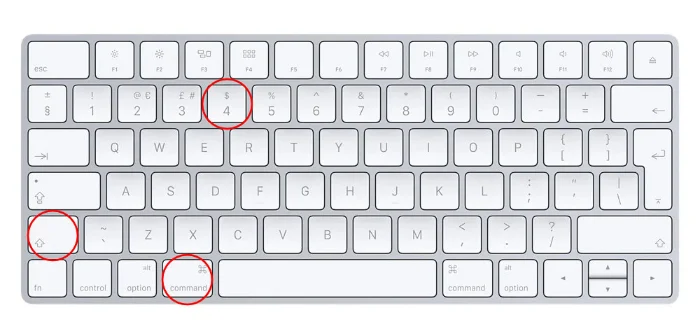
But wait, there’s more! If you need to take a quick screenshot of your entire Mac screen, simply press Shift + Command + 3. And if you only need to capture a specific section of your screen, use the shortcut Shift + Command + 4 to select the area you want to capture.
So whether you need to grab a screenshot for a project, create a tutorial, or just want to share a funny meme with your friends, the snipping tool on your snip on Mac has got you covered with these simple shortcuts.
If you’re using a MacBook or iMac running the macOS Mojave operating system or later, you’ll be pleased to know that accessing the Mac Snipping tool control panel is a breeze. All you have to do is use the shortcut Shift + Command + 5, and the control panel will appear at the bottom of your screen.
Once you’ve got the control panel open, you can take advantage of all the fantastic screen capture options available to you. Whether you need to take a simple screenshot, capture a specific area of your screen, or even record a video tutorial, the snipping tool has got you covered.
And if you’re the type of person who likes to customize your workflow to make things even easier, Apple has provided a range of useful settings that you can play around with to get things just right.
So whether you’re a teacher, a content creator, or just someone who loves to capture and share screenshots, the snipping tool on your Mac is the perfect tool for the job.
Options for the Mac Snipping tool
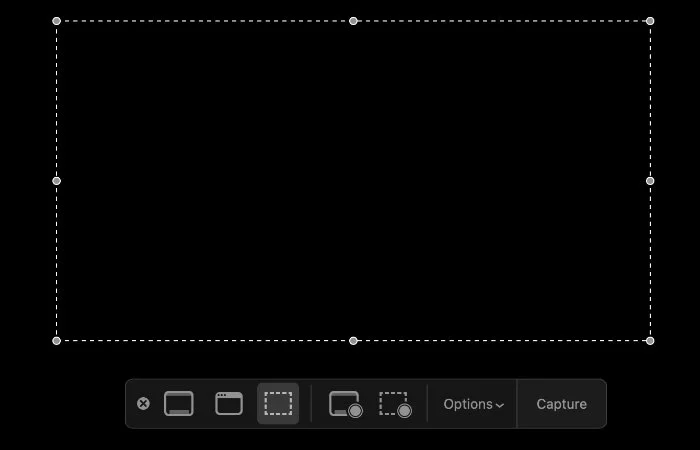
Let me tell you all about the different buttons on the Mac snipping tool! Starting from the left-hand side, if you click on the cross within the circle, it will close the snipping tool and take you back to your desktop.
Moving on, the next three buttons are where the magic happens. They allow you to take screenshots in different ways. The first button, which looks like a rectangle, lets you capture the entire screen. The second button, which looks like a rectangle with two lines on either side, allows you to capture a selected window. And finally, the third button, which looks like a dashed rectangle, lets you capture selected portions of your screen. And don’t worry, if you forget what each button does, just mouseover it to see a handy tooltip.
The next two buttons with circles in their bottom right corners allow you to capture video of your screen. The first button lets you record the entire screen, while the second button, which looks like a dashed rectangle, lets you record selected portions of your desktop.
So whether you’re capturing screenshots for work, school, or just for fun, the snipping tool on mac tool has got everything you need to make it happen.
Mac Snipping tool: Changing the default save location
Mac makes it super easy to take and save screenshots? By default, any screenshots you take will be saved to your desktop with the name “Screen Shot [date] at [time].png.”
But wait, there’s more! If you’re running macOS Mojave or later, you can even change the default location where your screenshots are saved from the handy Options menu in the Screenshot app. So if you’d rather have them saved to a different folder or document, it’s as easy as pie.
And if you’ve already taken a screenshot and want to move it to a different location, you can simply drag the thumbnail to wherever you want it to go. It’s that easy!
So whether you’re a blogger, designer, or just someone who loves to capture and share screenshots, your Mac has got you covered with these convenient features.