By taking HDR photos, the photographer can combine dark, medium, and light halftones from several images into one, obtaining an expanded dynamic range. This makes it possible to take high-quality pictures even in difficult light conditions. Of course, some of the work can be left to post-processing. Luminar Neo is one of the best HDR software on the market, with which you will easily bring any shot to perfection.
Today we will talk about how to take HDR photos, what camera settings are needed, and what additional equipment may be useful.
For Which Situations HDR Is Suitable
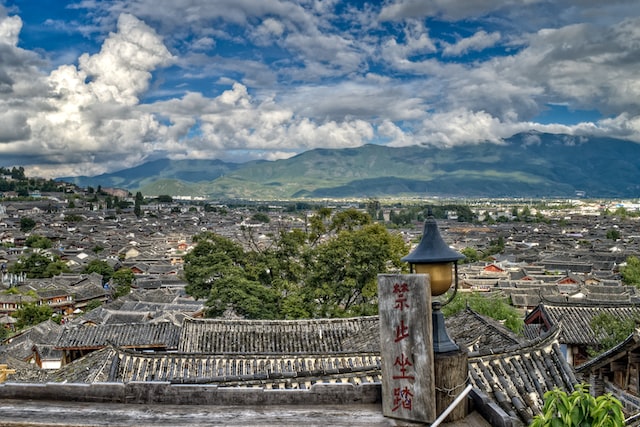
Don’t think of HDR as a universal way to get good pictures, it’s not. So how do you determine whether it’s better to take a normal or an HDR photo? In fact, it’s very simple. All you have to do is take a test shot, not in HDR, but in normal mode. If the scene looks stunning in live action, but the shadows on the photo become just black spots, HDR can help in this situation. As an example, try shooting a storm with this technology and the result will exceed your expectations!
Let’s take another example, you are trying to catch a sunset in front of the camera. In that case, you have to act very fast to get the best shot. Also, the dynamic range of such an image is already wide enough, so there is no need to waste time using HDR. But there are exceptions to every rule, right? In our case, it’s the use of a tripod. If you are using it, you may want to take some test shots.
There are some types of photography that HDR is not good for:
- In most cases, it is better to use the normal aperture priority mode or completely manual settings. An exception might be shooting at noon when you want to get rid of harsh shadows on the face of the model;
- Subject and studio photography;
- Fog;
- Reportage;
- Shooting sports, children, animals, macro;
- Winter Landscape;
- Architecture and landscapes on a dark rainy day.
Using a Tripod
To combine multiple HDR photos, you can use different methods, such as automatic on-camera or manual with the help of a photo editor. The most important detail is the complete identity of the images, no matter which method of stitching is chosen. If the photographer is holding the camera in his hand, even with a fast shutter speed, there may be a slight shift, while with a slow shutter speed, the picture will just be blurred. In that case, the final result will only bring disappointment. So, how can you make perfectly matched shots? With a tripod, of course.
However, you can also take pictures without a tripod if you don’t have time to use one. In that case, you might want to try doing HDR automatically or use exposure bracketing. In any case, you need to find firm support so that the camera will not wobble and the picture will not be ruined. If your equipment has an image stabilizer, be sure to turn it on.
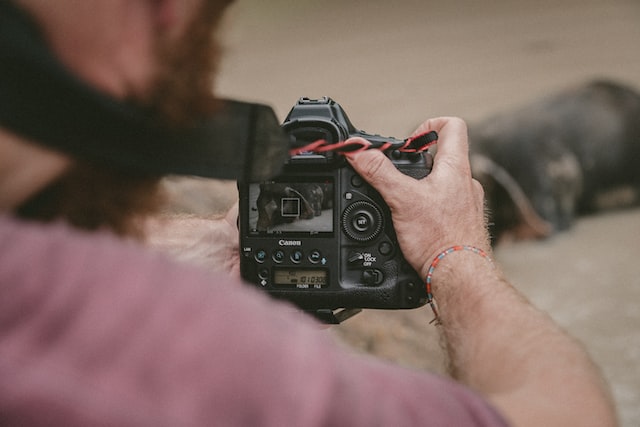
How to Set Up a Camera for Taking Pictures
It is preferable to shoot in RAW format. In this way, the photographer will have more opportunities to correct the frame in further processing.
The most convenient modes for such shooting are aperture priority and manual mode.
It is better to set ISO to a minimum of 100. If there is enough light, you can shut down the aperture to f11. Naturally, you will need to adjust all settings depending on the shooting conditions, and they will differ on a bright sunny day or in the evening.
It is better to use automatic exposure bracketing. You can find this feature even in budget cameras. It allows you to take several photos at different exposures. How wide the range will be must be specified manually in the camera menu. To start with, it is recommended to try 3 exposure options – ±2 EV or ±3 EV.
To avoid mistakes, it is better to choose matrix exposure metering in the menu. After that, focus on the desired point automatically or manually and turn off the autofocus.
How Many Pictures to Take?
When you start to learn about HDR photography, it is better to use the classic scheme for this technology. Namely, take three frames with different exposures ranging from ±2 EV or ±3 EV. At the same time, it is worth evaluating the scene and lighting conditions.
Professionals often use much more different exposures up to 9. This allows them to achieve maximum detail in lights, shadows, and mid-tones. You can simply change the shutter speed For efficient and fast work, one step manual mode is utilized. This will give you as many different exposures as you need.
Also, the popular number of exposures for HDR photos is 5. Such a spread helps to work out all the necessary details and gives a wide dynamic range. It is also important to evaluate the shooting conditions. In many cases, 3 exposures are enough and it is faster to work in such a format.
5 exposures are relevant when many details are hidden in deep shadows, in the highlights and mid-tones. For example, on a bright sunny day. When the sky is overexposed, and shadows in the forest thickets are too dense. In such a situation, HDR photography will better render the picture, bringing it closer to what the human eye sees.
Conclusion
For those who have never created HDR photos, it may seem very complicated and inaccessible to beginners. In fact, this technology can be easily mastered. The main thing is to practice more, trust your intuition, and use theoretical and practical knowledge of how to make HDR photos. There are several ways to create such pictures and everyone can choose the one that suits him, improving his skills in this genre over time.